Hi all! I thought it would be a good idea to put up a quick, easy and light makeup look that you can wear all summer long with comfort.
Begin by washing and moisturizing your face.
Firstly, conceal under your eyes and any redness/blemishes. Blend in with your preferred tool.
Now, pick up Maybelline's Dream Pure BB in your applicable shade. What's cool about this BB cream is that it actually has 2% salicylic acid in it, so it will help treat any blemishes. Work this in with your fingers, brush, sponge, etc.
Set your makeup with Rimmel's Stay Matte pressed powder.
Add the color back into your cheeks with your favorite blush.
Moving onto the eyes, use your preferred eye primer all over the eyes. From Urban Decay's Naked Basics palette, contour out (lightly) the crease of your eye with "Naked 2".
From the same palette, use your finger to brush "Venus" onto the eyelid. Don't overdo it with the color because it is a shimmer. The idea is for it to be just a wash of color, not an attention grabber.
Take a liquid liner with a brush tip, or a marker liner, and do the skinniest line you can manage to do on the upper lash line. The reason that you need to use a brush applicator is because a brush has less of a tendency to bleed; you'll want your eyeliner to look as clean as possible. Do a mini wing if you so choose. For such a presses job, I recommend Wet 'n' Wild's MegaLiner, which is available in waterproof as well as a washable formula.
Curl your lashes and add mascara. Since this is a more natural look, use Maybelline's MegaPlush. Do the bottom lashes super lightly if you so wish.
Gently rim your waterline with a nude eyeliner. Try Rimmel's ScandalEyes in "Nude".
Lastly, fill in your brows. I seriously recommend using a powder because it's the softest-looking appearance. Before you fill in your eyebrows, groom them using an eyebrow comb. Use an angled brush for the most precision. Try out one of these two eyebrow kits. Blend out any excess powder using a spooley brush.
Finish everything off with a nude lipstick and nude gloss.
Enjoy! :)
Wednesday, June 25, 2014
Sunday, June 22, 2014
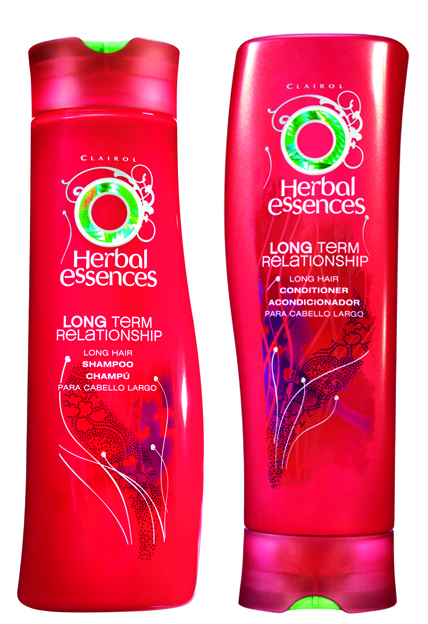
#LongHair #YouShouldCare
Hi everyone!
Today I wanted to show you all my favorite shampoo/conditioner combo of the moment because these two have been doing great things for my hair! I have fewer split ends, my hair is shiner, my hair is softer and smells great. I think these two, my It's a 10 and my Wet Brush have totally revolutionized my hair.
If you are unfamiliar with It's a 10, I did dedicate a post to it. You can read my thoughts and review here.
I think these products ale the perfect hair care routine for summer. I highly recommend all of these products for silky smooth hair!
If you have any further questions, email me at: makeupbymere07@gmail.com! :)
Saturday, June 21, 2014
NYX vs. Prestige
Hi all!
So, recently, I really have been obsessed with brows! Lately I have been loving filling mine in to make them super bold and shaped. However, I really don't like how pencil looks, so I use powder to fill mine in.
I have used basically everything in the book from "Naked 2" to "Faint" to Maybelline's Ultra Brow Brush On Powder, and I think I have found to great ones from the drugstore. Let's compare them side by side:
Really on this one, it's up to you guys and your preferences. It honestly can't hurt to try both!
So, recently, I really have been obsessed with brows! Lately I have been loving filling mine in to make them super bold and shaped. However, I really don't like how pencil looks, so I use powder to fill mine in.
I have used basically everything in the book from "Naked 2" to "Faint" to Maybelline's Ultra Brow Brush On Powder, and I think I have found to great ones from the drugstore. Let's compare them side by side:
NYX’s For those Movie Star Brows Eyebrow Cake Powder in “Blonde”
|
Prestige’s BrowPerfection Brow Shaping Studio in “Light to
Medium”
|
$5.99
|
$8.95
|
Comes with angled brush & spoodely
|
Comes with angled brush, mini tweezers & eye brow
stencil
|
2 powder colors & 1 gel included
|
2 powder colors included
|
2.65 g of total product including gel
|
2.9 g of total product including both powders
|
Packaging: ****/***** (4/5) no mirror inside
|
Packaging:*****/***** (5/5) mirror inside
|
Great for beginners.
|
Quite comparable to Benefit’s Brow Zings
|
6 different colored palettes available
|
2 different colored palettes available
|
Really on this one, it's up to you guys and your preferences. It honestly can't hurt to try both!


Friday, June 20, 2014
Organize your Samples/Travel-Sized Makeup!
Begin with the mess of mini makeup, whether it be samples, travel-sized products or an assortment of both.
Grab your container/organizer. The one featured in this post is from Marshalls.
Arrange as you so desire.
With any remaining room, stash away tools like tweezers and an eyelash curler! :)

Grab your container/organizer. The one featured in this post is from Marshalls.
Arrange as you so desire.
With any remaining room, stash away tools like tweezers and an eyelash curler! :)
Tuesday, June 17, 2014
Waterproof pictorial

1. Primed eye
2. Crease contoured with "Naked 2"
3. "Amber Rush" added with flat shader
4. Liquid liner added, eyelashes curled and mascara applied
5. Final look
Monday, June 16, 2014
Perfect Waterproof & Summer Look
Hi all! I thought that today I'd put up the perfect makeup look for you guys using a mix of Holy Grail products and Newly Found Loves!
Begin by preparing your face by washing, moisturizing it and using any other facial products that are apart of your everyday skin routine.
Now, grab your foundation sponge and soak it with water, squeezing out any excess water. For foundation, I highly recommend CoverGirl's Stay Fabulous 3-in-1 foundation. You won't have to frog around with any primer, because it's already in the foundation. There is also concealer in there, but I like to add a bit more under the eyes for that well rested look. Blend in your foundation using that sponge.
Next, grab NYX's Incredible Waterproof Concealer Stick. Apply this onto any blemishes and under the eyes. Blend in with your fingers and sponge, depending on what you prefer.
Set all of that with Rimmel's Stay Matte Pressed Powder. Use a large powder brush to blend out the powder.
Cream blush will outlast powder. Try Maybelline's Dream Bouncy Blush in "Rose Petal". Simply apply it to the apples of your cheeks blending upwards towards your ears using your fingers.
Just to totally lock everything in, spray a couple spritzes of Urban Decay's All Nighter Spray.
Let's move onto the eyes. First, prime your eyes using NYX's Proof It! Waterproof Eye Shadow Primer. Swipe this all over the lid. Blend up towards your brow bone using your ring finger.
Now, take NYX's Jumbo Eye Pencil in "Milk" and swipe this a couple of times strictly on the lid. Blend up towards your brow bone. What this does is even out your eyelid and provide a tackiness for the eye shadow to adhere to.
Next, grab Urban Decay's Naked Basics palette, and with a large and fluffy blending brush, blend the color "Naked 2" into your crease and only your crease.
Now, take L'Oréal's Infallible 24 HR Eye Shadow in "Amber Rush" to your eyelid using a flat shader brush. Strictly keep it on the lid.
Now, taking the same brush that you did your crease with, blend Amber Rush and Naked 2 together at the crease.
Even though this eye look is quite easy to create and recreate, we are going to add some winged eyeliner to make it look as though we invested in more time than we actually did. If you prefer a brush tip liquid eyeliner, try Wet 'n' Wild's H20 Proof Liquid Liner. I have used the original countless times, and it is one of my favorites. If you prefer a felt tip, use Jesse's Girl Waterproof Eyeliner, which is a felt tip in marker format. (Winged liner tutorial up soon!)
Let your eyeliner dry. Now curl your lashes. Right now, I seriously have been loving, and have been quite pleasantly surprised with! It does a fantastic job!
Follow up curling with Maybelline's The Falsies Big Eyes mascara.
Lastly, fill in your brows using NYX's For Those Movie Star Brows Eyebrow Cake. To waterproof your brows, set them with NYX's Eyebrow Shaper. Wax has enough a waterproof property to seal the color into your brows.
If you really want your lips to stay on, use a stain, like Benefit's Benetint.
Enjoy! :)
Sunday, June 15, 2014
Maybelline Redeems Herself!
Sorry I've been gone so long!
Let's kick the blog back off with a review of the controversial Maybelline Falsies Big Eyes mascara.
So I originally was interested in this mascara because of the bottom lash wand. I do own (and love!) Clinique's Bottom Lash mascara, but it is quite pricey for such a small item! While Clinique's Bottom Lash runs $10 a tube, Big Eyes runs $6.99 at places like Target and The Christmas Tree Shop ($5.09 on Target's website...). I was also in need of a waterproof mascara, since I work at a summer camp.
Most people I have spoken with about this mascara don't like the top brush because it seems to e different from the Falsies Original and Black Drama, both of which, I did not like. I however like the change! I also think the formula was revamped! It's much less clumpy and really does open up your eyes!
The longevity of this mascara is incredible! I didn't need a primer, but I did curl my eyelashes as always. My eyelashes didn't flop over. Nor did the product smudge, fade or flake off, like Black Drama or the original.
After about two coats (drying in between) did I notice a bit of clumping. However, I do like the spidery look, so I always do two coats of mascara.
Pigmentation: ****/***** (4/5)
Wear: *****/***** (5/5)
Price: *****/***** (5/5)
Ease of application: *****/***** (5/5)
Comfort of wear: *****/***** (5/5)
Packaging: *****/***** (5/5)
Total: 29/30! 97% :)
Have any further questions about this product? Comment down below or drop me an e-mail!
I also thought the ad was clever and cute! :) The Girl with the Big Eyes
Subscribe to:
Posts (Atom)